Appearance
How to Make a Genogram (Step-by-Step Guide)
A genogram is built by gathering family information, placing people by generation, connecting them with structural lines, and then adding the relationship or health detail your use case needs. The core process stays the same whether the genogram is for a school project, therapy intake, or family medical history. This guide walks through the full build from start to finish.
How To Make A Genogram: Step By Step
These are eight steps for building an easy genogram.
Step 1: Gather your information
What the genogram is for determines what you collect: a class assignment needs three generations and basic structure; therapy or social work adds emotional lines and significant events; medical history prioritizes diagnoses and causes of death across generations.
When in doubt, default to three generations with basic structural lines.
Collect names and genders, birth and death dates, marriages and divorces with approximate dates, children in birth order, and any remarriages or step-relationships.
Add causes of death, medical conditions, mental health history, and relationship notes; who is close, who is in conflict, who has cut contact, and where you have them.
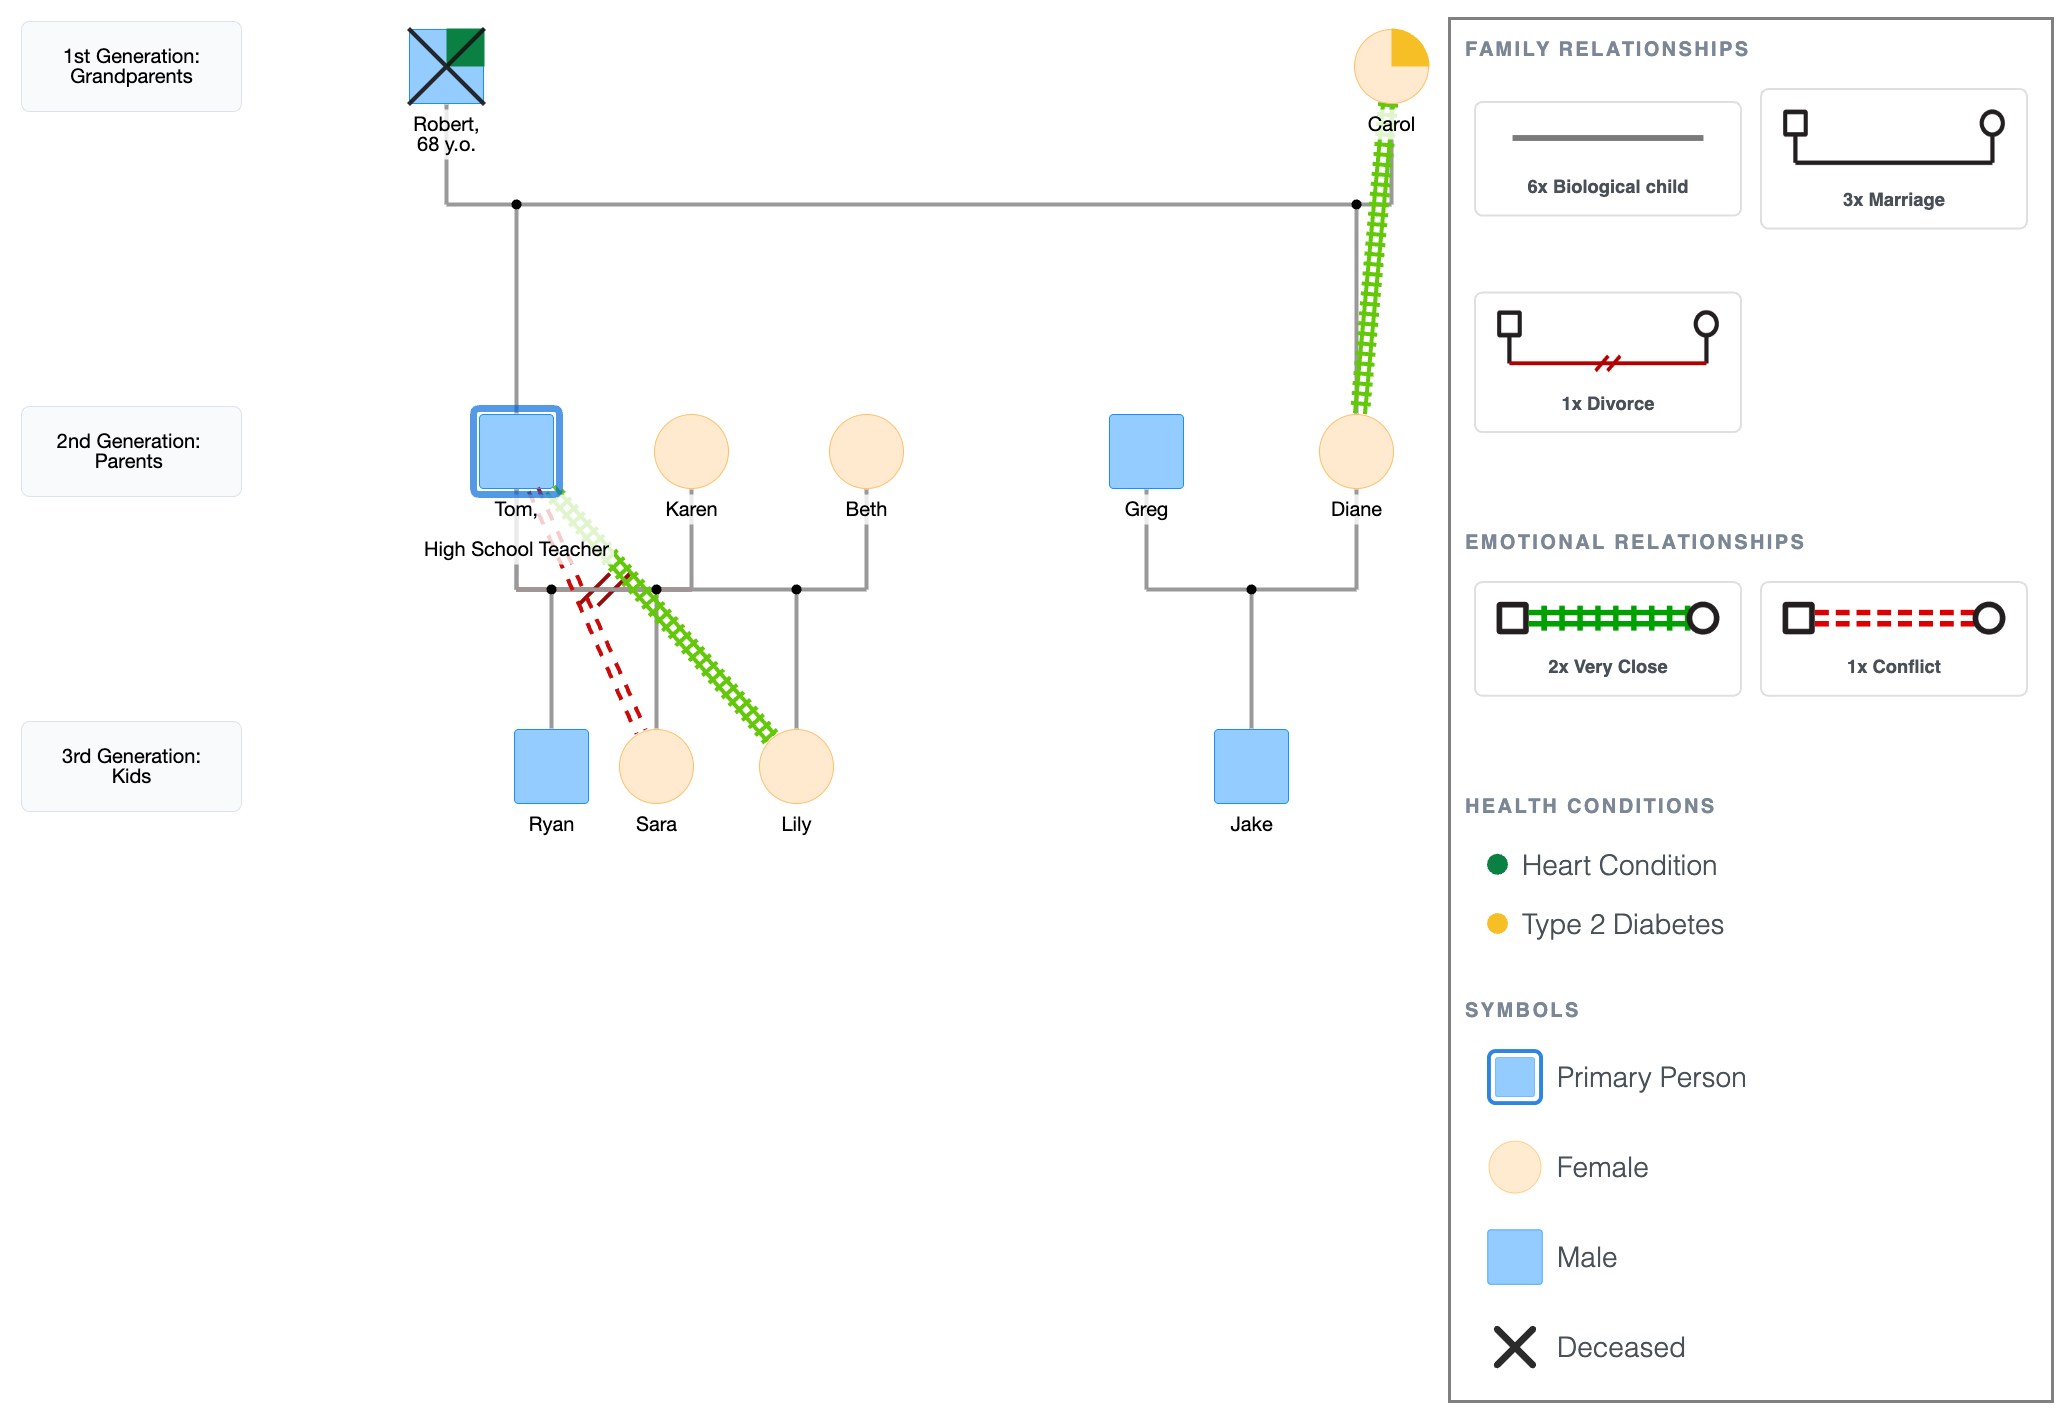
For this walkthrough, we’ll use the Hargroves:
- Grandparents: Robert (deceased, heart condition at 68) and Carol (type 2 diabetes), married.
- Their children: Tom and Diane.
- Tom first married Karen; they divorced. Tom later married Beth.
- Tom and Karen's kids: Ryan (older) and Sara.
- Tom and Beth's kid: Lily.
- Diane married Greg: one child, Jake.
- Tom is the primary person; he's a high school teacher.
- Tom and Sara have a conflicted relationship post-divorce.
- Tom is very close to Lily.
- Carol and Diane are very close.
This is the necessary information we have to build this family’s genogram.
Step 2: Learn the core symbols
You don’t need to memorize the full symbol set before starting. But know these:
People:
- Square = male, circle = female.
- X through a shape = deceased.
- Double outline = primary person.
Relationships:
- Solid horizontal line = marriage.
- Marriage line with a red slash = divorce.
- Double green lines = emotional closeness.
- Red dashes = conflict, distance, or cutoff.
For the complete reference, see the genogram symbols guide.
Step 3: Start building the genogram
Open Genogram Maker and start drawing; the canvas is ready when you land on the tool page. This is what we'll use for the Hargroves.
If you're building by hand, in Word, in Google Docs, or in Canva instead, follow the guide for that method before continuing.
If you want a browser-first tool overview before starting, compare Free Genogram Maker, Online Genogram Maker, and Best Genogram Maker.
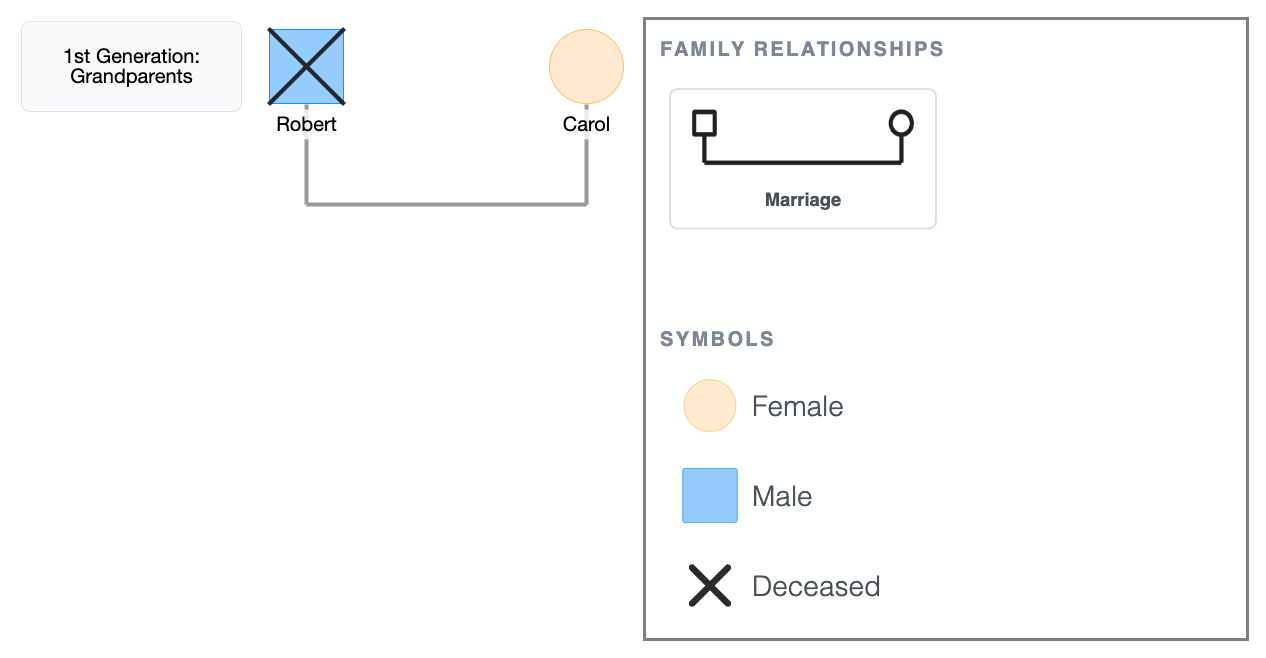
Step 4: Draw the oldest generation
- Click the + button on the canvas to add a person, or drag a shape/template from the sidebar.
- Place Robert (square) on the left and Carol (circle) on the right.
- Click Robert's node; the quick-add buttons appear around it. Click Add Partner to add Carol, and EasyGenogram automatically draws the marriage line between them.
- Write their names below their shapes.
- Robert is deceased; click his node and mark him as deceased to add the X.
1st Generation Genogram
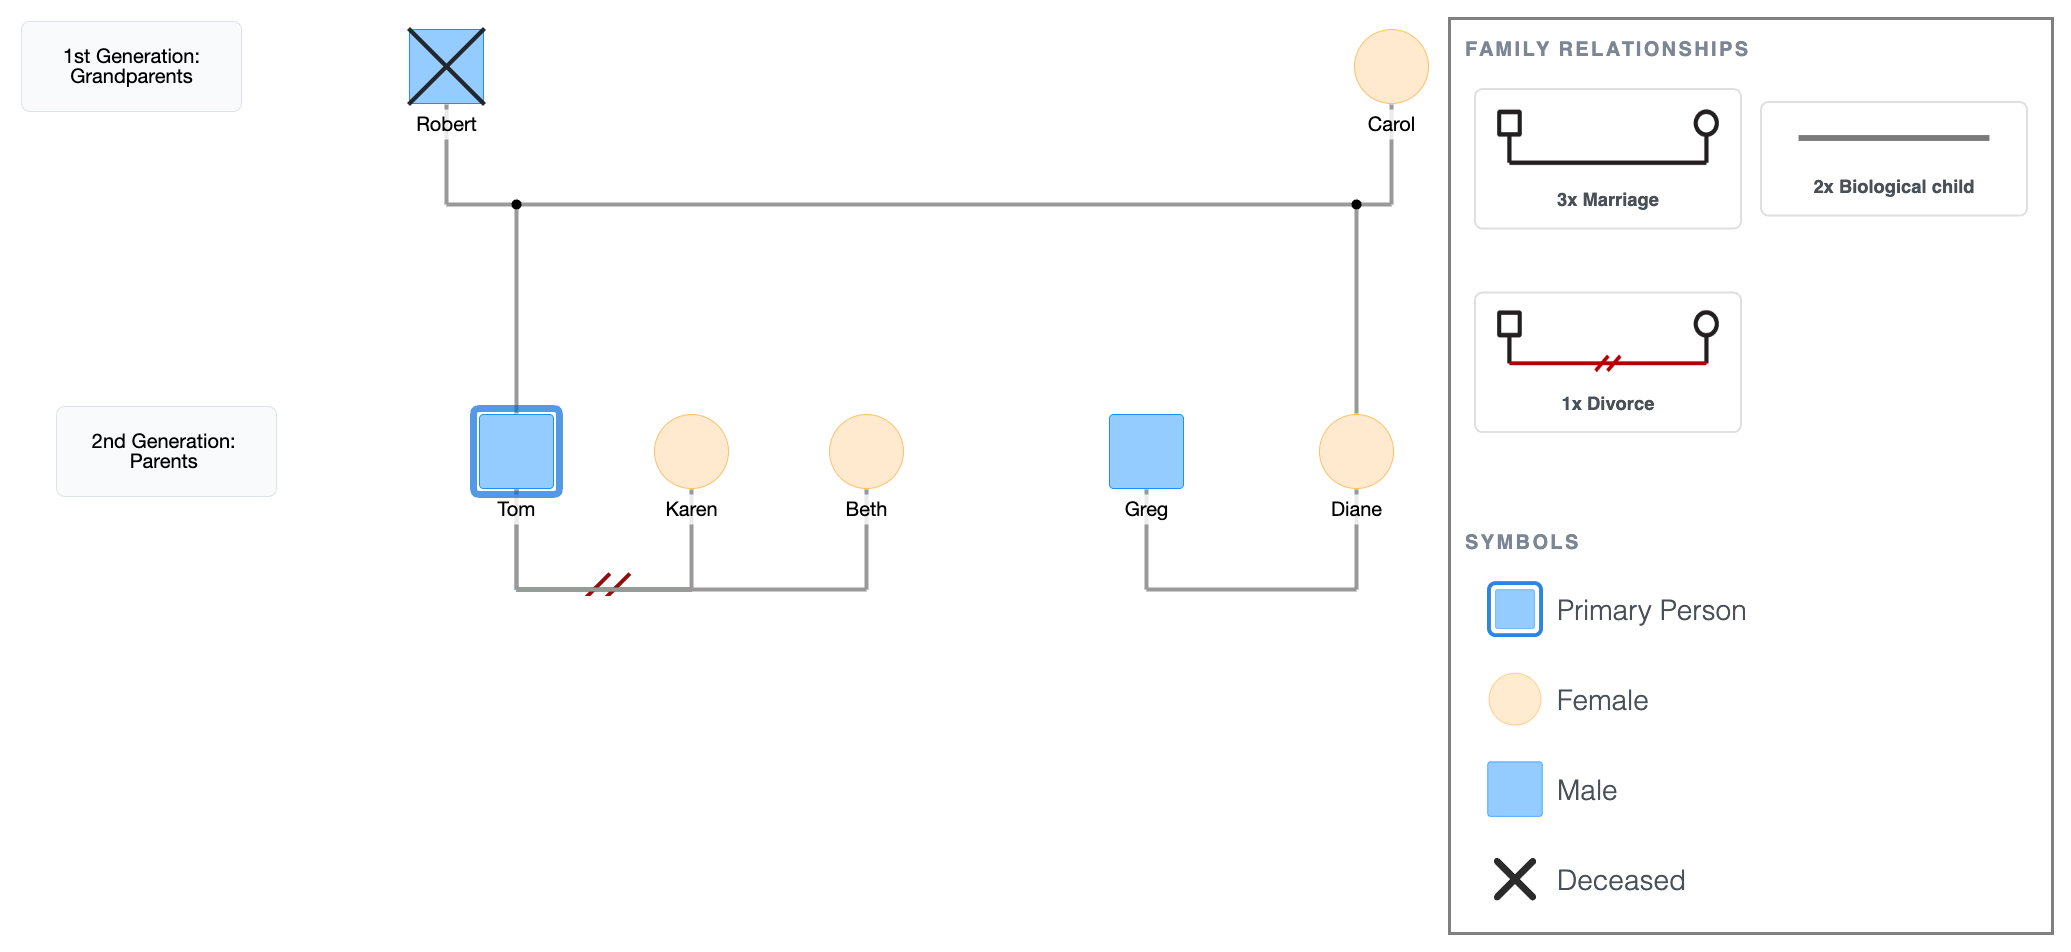
Step 5: Add the second generation and their partners
- Click Robert or Carol's shape; the quick-add buttons appear. Click Add Children to drop Tom and Diane onto the canvas below, already connected to the generation above.
- Birth order runs left to right; move Tom to the left and Diane to the right.
- Mark Tom as the primary person.
- Click Tom's shape and select Add Partner to add Karen. EasyGenogram draws the marriage line automatically; change it to a divorce line in the relationship options.
- Click Tom's shape again and select Add Partner to add Beth. A second marriage line draws to the right of the divorce line. (First partner always closest, subsequent partners further out.)
- Click Diane's shape and select Add Partner to add Greg. Drag him to the left of Diane.
2nd Generation Genogram + Partners
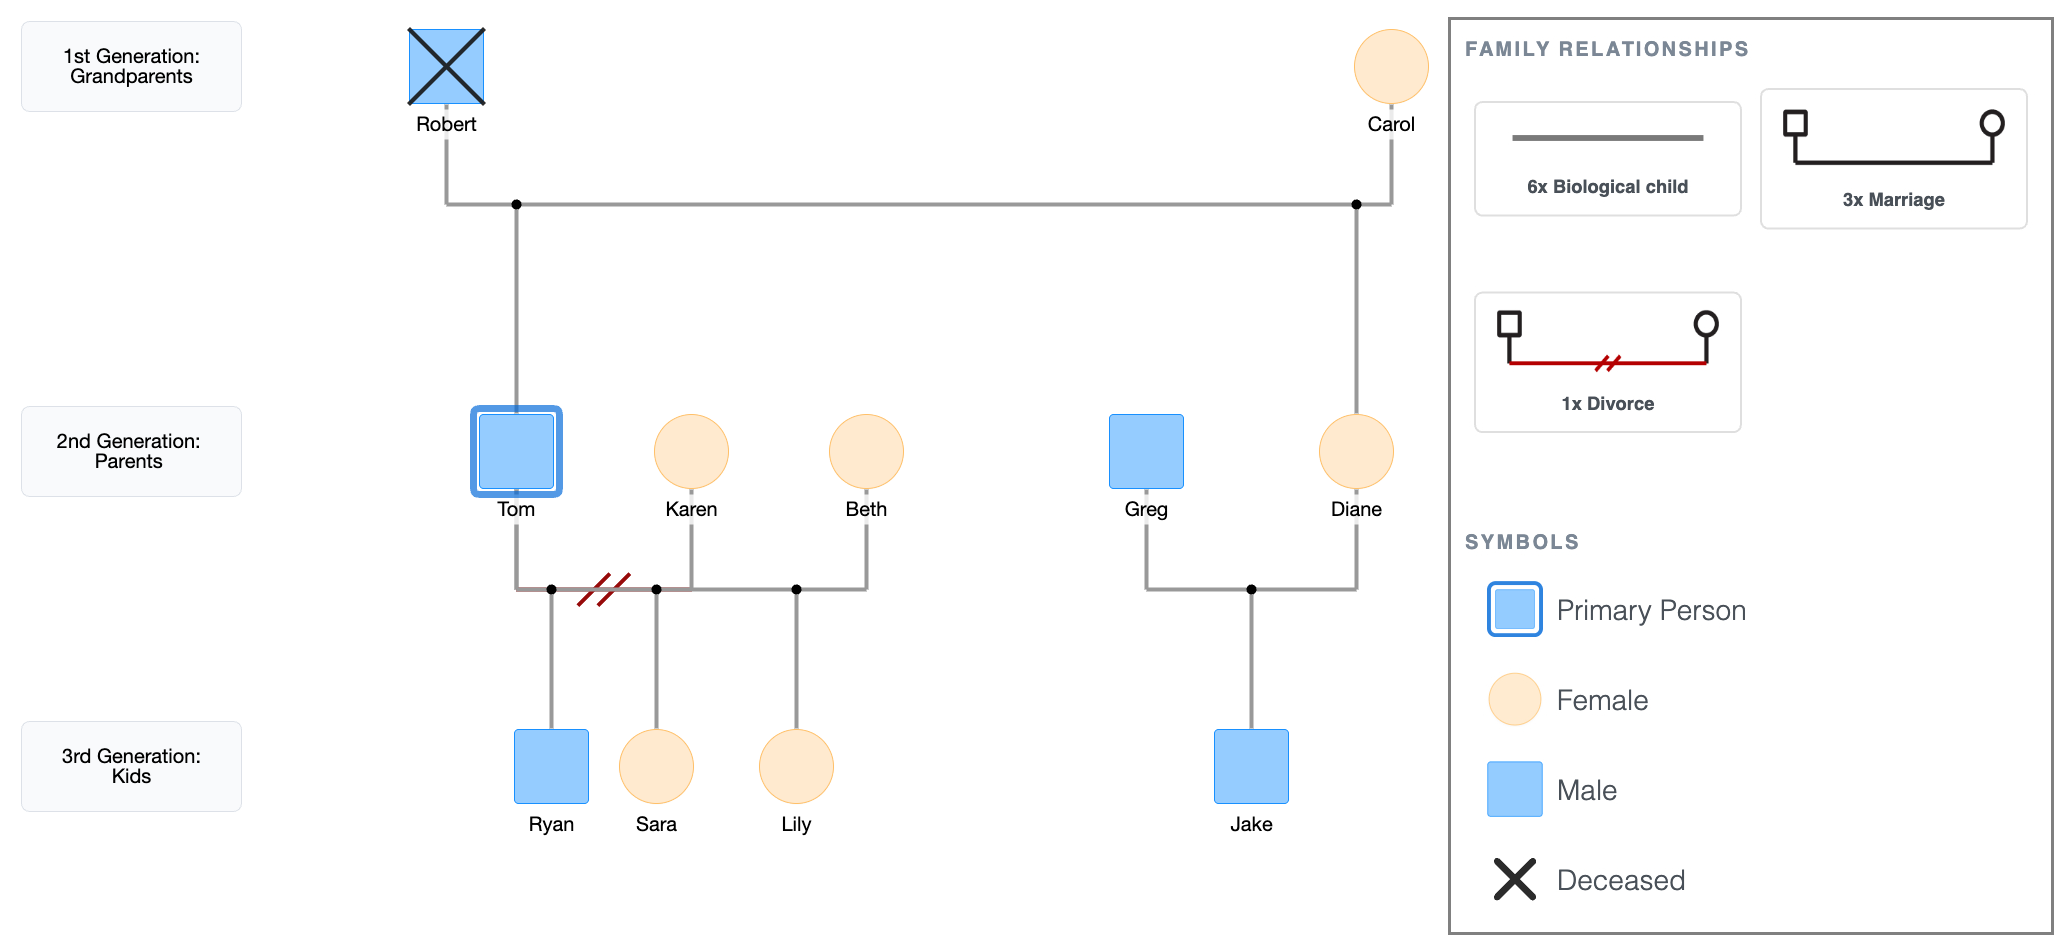
Step 6: Add the third generation
- Click Karen’s shape and select Add Children; Ryan and Sara drop in below Tom and Karen’s marriage line.
- Move Ryan to the left and Sara to the right (birth order).
- Click Beth’s shape and select Add Children; Lily drops in below Tom and Beth’s marriage line.
- Click Diane or Greg’s shape and select Add Children; Jake drops in below their marriage line.
3rd Generation Genogram
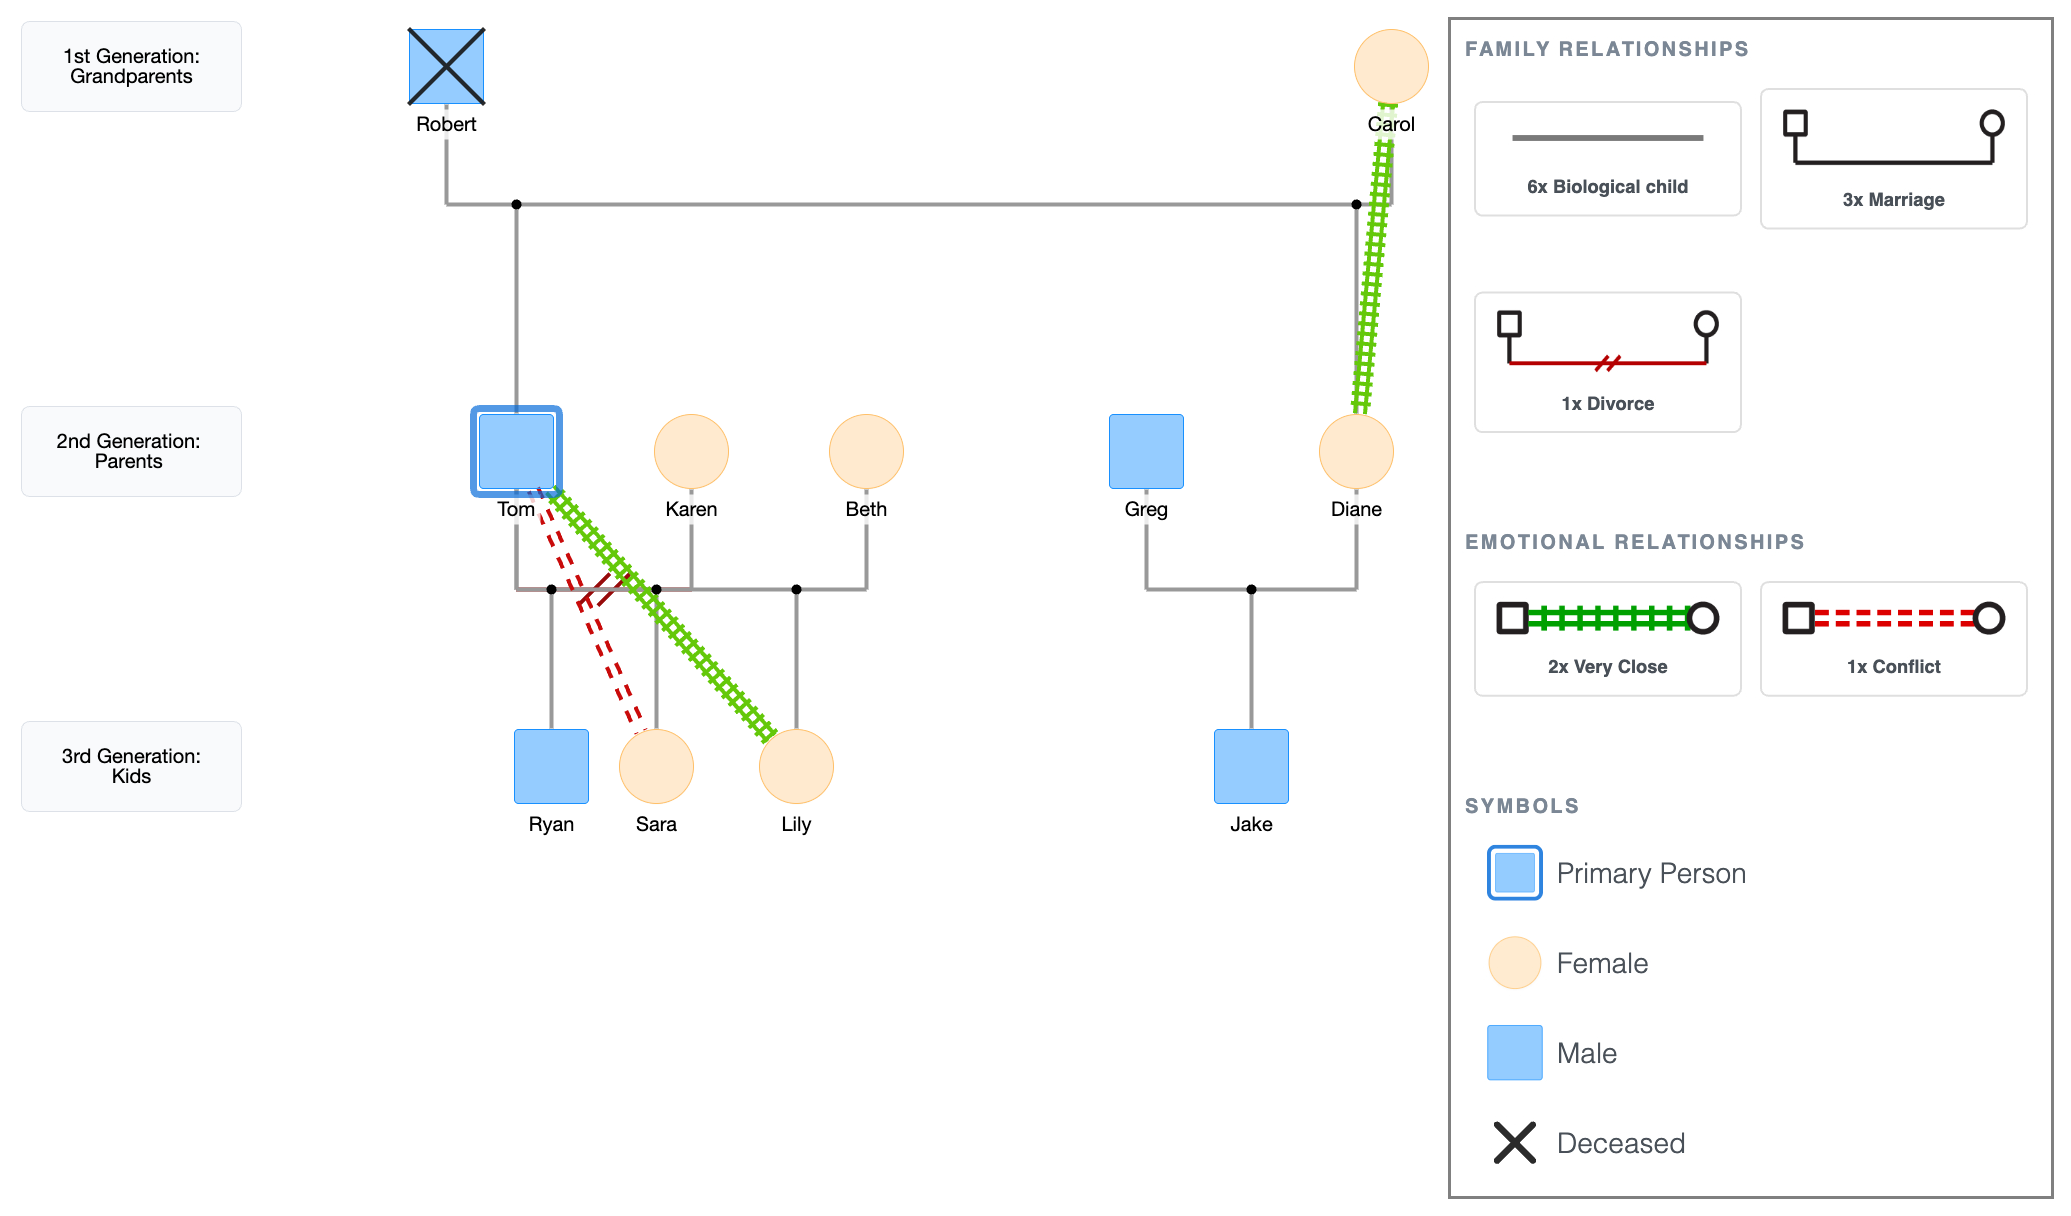
Step 7: Add emotional relationship lines
Draw emotional lines directly between the people where relationship quality matters.
These connect any two individuals, and not just couples, and don't follow the structural hierarchy.
For the Hargroves:
- Tom and Sara: conflict line (red dashes).
- Tom and Lily: closeness line (double green lines).
- Carol and Diane: closeness line (double green lines).
Draw these after the structure is complete so you can route them cleanly without crossing existing lines. To do this:
- Click Tom's shape, the quick-add buttons appear. Click Connect, then click Sara's shape. A relationship picker pops up; select the conflict line.
- Click Tom's shape again, click Connect, then click Lily's shape. Select the closeness line from the picker.
- Click Carol's shape, click Connect, then click Diane's shape. Select the closeness line.
Emotional Lines in a Genogram
Step 8: Add notes and details
Add ages, dates, health conditions, occupations, and anything else relevant directly on the diagram, close to the person or relationship they describe.
For the Hargroves:
- Robert's cause of death (heart condition, age 68),
- Carol's diabetes is noted in her circle,
- Tom's occupation (high school teacher) is under his square.
With these in place, the genogram is complete.
Additional Details in a Genogram
Genogram Layout Checklist
These are the most common mistakes that make a genogram hard to read.
Run through this list before calling it done.
- Male left, female right; in every couple pair without exception.
- Children are placed from left to right by birth order, oldest on the left.
- Each generation is on the same horizontal level, no drifting up or down.
- Child connection lines run vertically, not at an angle.
- Multiple partners ordered correctly; first partner closest, then second, then third, etc.
- The primary person has a double outline.
- There should be enough space between people, as crowding makes the diagram hard to follow.
FAQ
How long does it take to make a genogram?
A basic three-generation genogram takes about 30 to 60 minutes once you have the information. Adding emotional relationships and medical detail brings it closer to 1 to 2 hours. The information-gathering phase, such as interviewing family members and tracking down dates, can take longer than the drawing itself.
What’s the minimum information I need to make a genogram?
Names, genders, and relationships: who is partnered with whom, and who the children are. Everything else, like dates, medical history, and emotional lines, is optional depending on your purpose of creating the genogram.
What if I don’t know all the information?
Leave the gaps. An incomplete genogram is still useful. Mark unknown gender with the question mark symbol, leave dates blank where you don’t have them. A partial picture is better than none, and genograms are meant to be updated over time.
How many generations should I include?
Three is the standard. Two works for simple overviews. Four or more is useful for tracking patterns across time, particularly in medical or therapeutic contexts.
Can I make a genogram online for free?
Yes. EasyGenogram is free to use. You can build from scratch or edit an existing example, then export as a PDF, PNG.
Sources
- Genograms for Psychotherapy
- Genograms: Assessment and Treatment (4th ed.).
- Focused Genograms: Intergenerational Assessment of Individuals, Couples, and Families (2nd ed.).
Related
How to Make a 3 Generation Genogram
How to Make a Medical Genogram