Appearance
How to Create a Sexual Genogram
This guide walks through the process of building a sexual genogram, step by step.
Before You Start
- If you're new to genograms, read How to Make a Genogram first before continuing here.
- This guide uses the EasyGenogram tool to build an example family genogram for a sexual genogram.
- For the full sexual genogram notation reference, see Sexual Genogram Symbols.
How to Create a Sexual Genogram: Step by Step
These are eight steps for building a sexual genogram.
Step 1: Gather the Information
A sexual genogram needs the standard genogram information, plus:
- Self-identified gender and sexual orientation for each person, gathered from the client directly, not assumed.
- The family's general climate around discussing sex: open, closed, or somewhere in between.
- Any sexual secrets or estrangements the family avoided discussing.
For this walkthrough, we'll use the Merrick/Paul family, here's information on them:
- Sam Paul, 24, is the primary person. Sam identifies as bisexual and is in a committed relationship with Jordan Banks.
- Sam's parents are Dan Paul and Diane Paul (née Merrick), both heterosexual.
- Diane's parents are Helen Merrick (née James) and Arthur Merrick, both heterosexual.
- Helen's brother, Ray James, came out as gay in his twenties. The family cut contact with him afterward and never discussed him again.
- Helen and Ray's parents are David James and Sarah James, both heterosexual.
- Most of the household's communication about sex is closed and fear-based. Ray is the exception; he's open about his life.
Step 2: Learn the Notation
Before building, know the codes this guide uses:
- Orientation: H (heterosexual), G (gay), L (lesbian), B (bisexual), P (pansexual), Q (queer or questioning), A (asexual).
- Sexual communication climate: Sex+ (open), Sex− (closed, fear-based), Sex∅ (neutral, not discussed).
- A double-hash mark on a relationship line shows a cutoff, the same symbol used on a standard genogram.
For the complete reference, see Sexual Genogram Symbols.
Step 3: Start Building in EasyGenogram
Open Genogram Creator and start with a blank canvas.
This is what we'll use for the Merrick/Paul family.
Step 4: Add the Oldest Generation
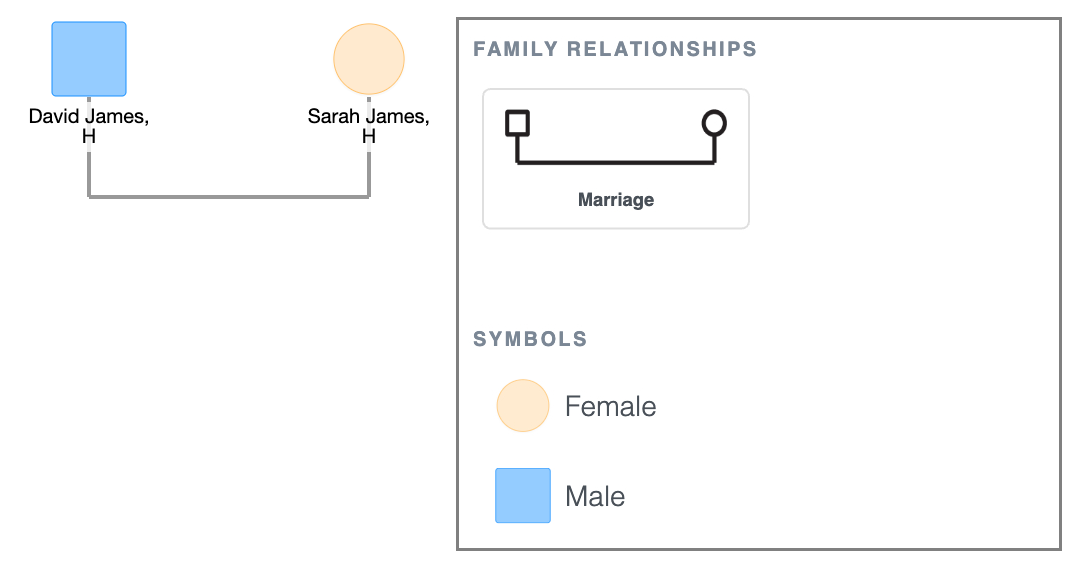
- Place David James on the left (square), Sarah James on the right (circle).
- Connect them with a solid horizontal marriage line.
- Tap each shape and add H in the notes field for their orientation (Gender identity).
Gen 1: David and Sarah James
Step 5: Add the Next Generation
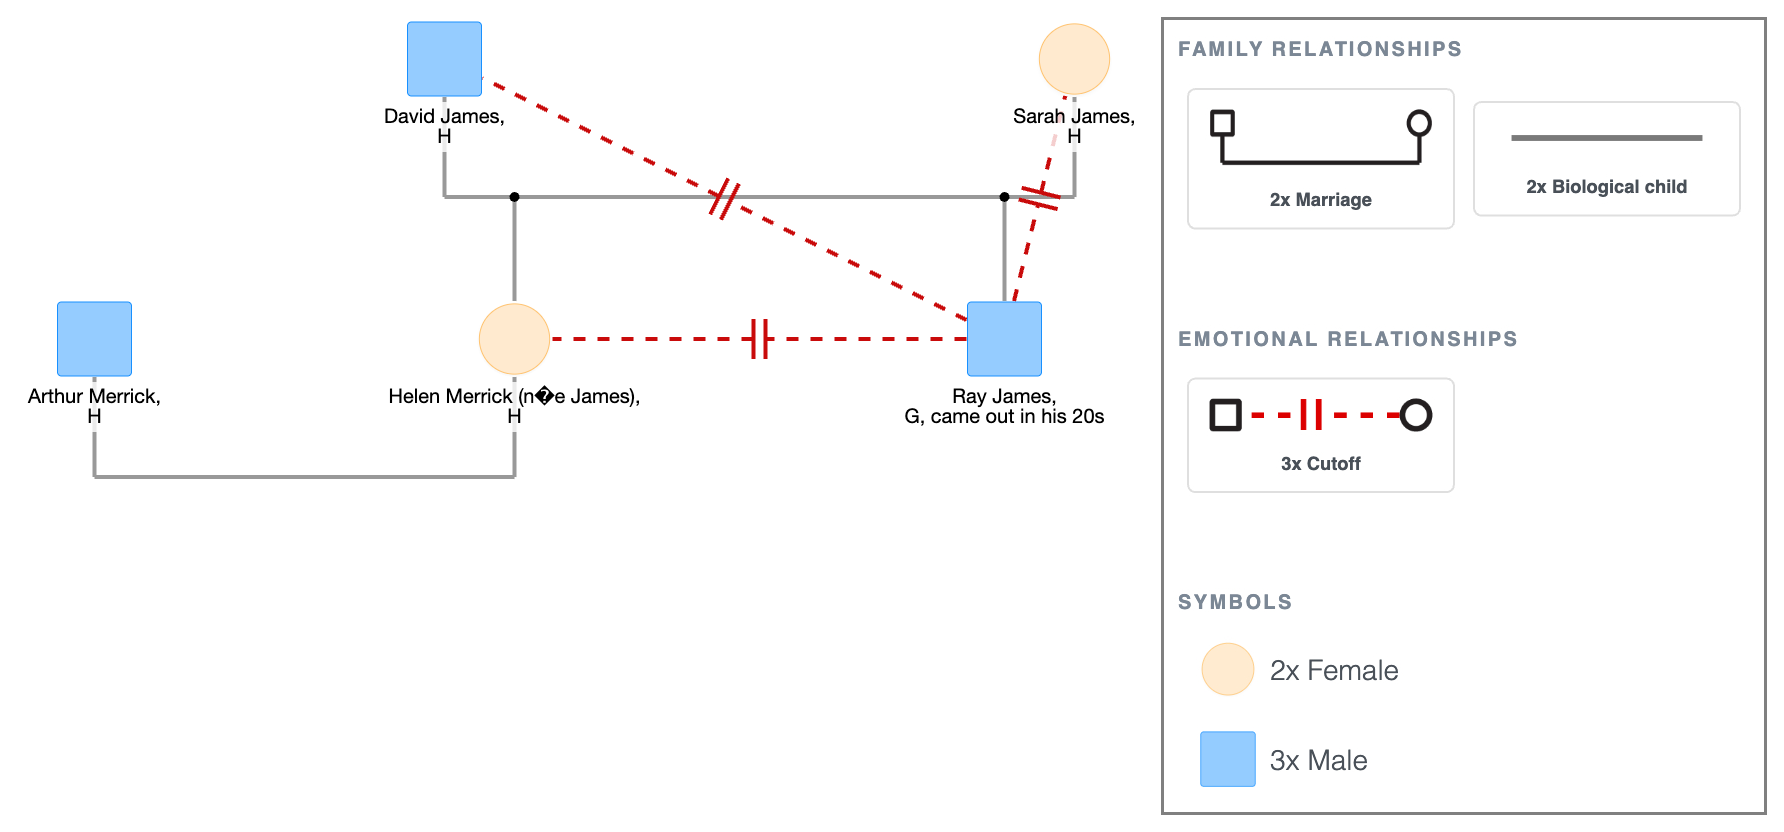
- Tap either David or Sarah's shape to add children, one male and one female.
- Place Helen on the left, Ray on the right.
- Give Helen a partner, Arthur Merrick, connected with a solid marriage line.
- Tap Helen's and Arthur's shapes and add H in the gender identity field.
- Tap Ray's shape and add G, came out in his 20s in the gender identity field.
- Connect Ray to David and Sarah, and to Helen, with a cutoff line to show the estrangement.
Gen 2: Helen, Arthur, and Ray
Step 6: Add the Parents' and Client's Generations
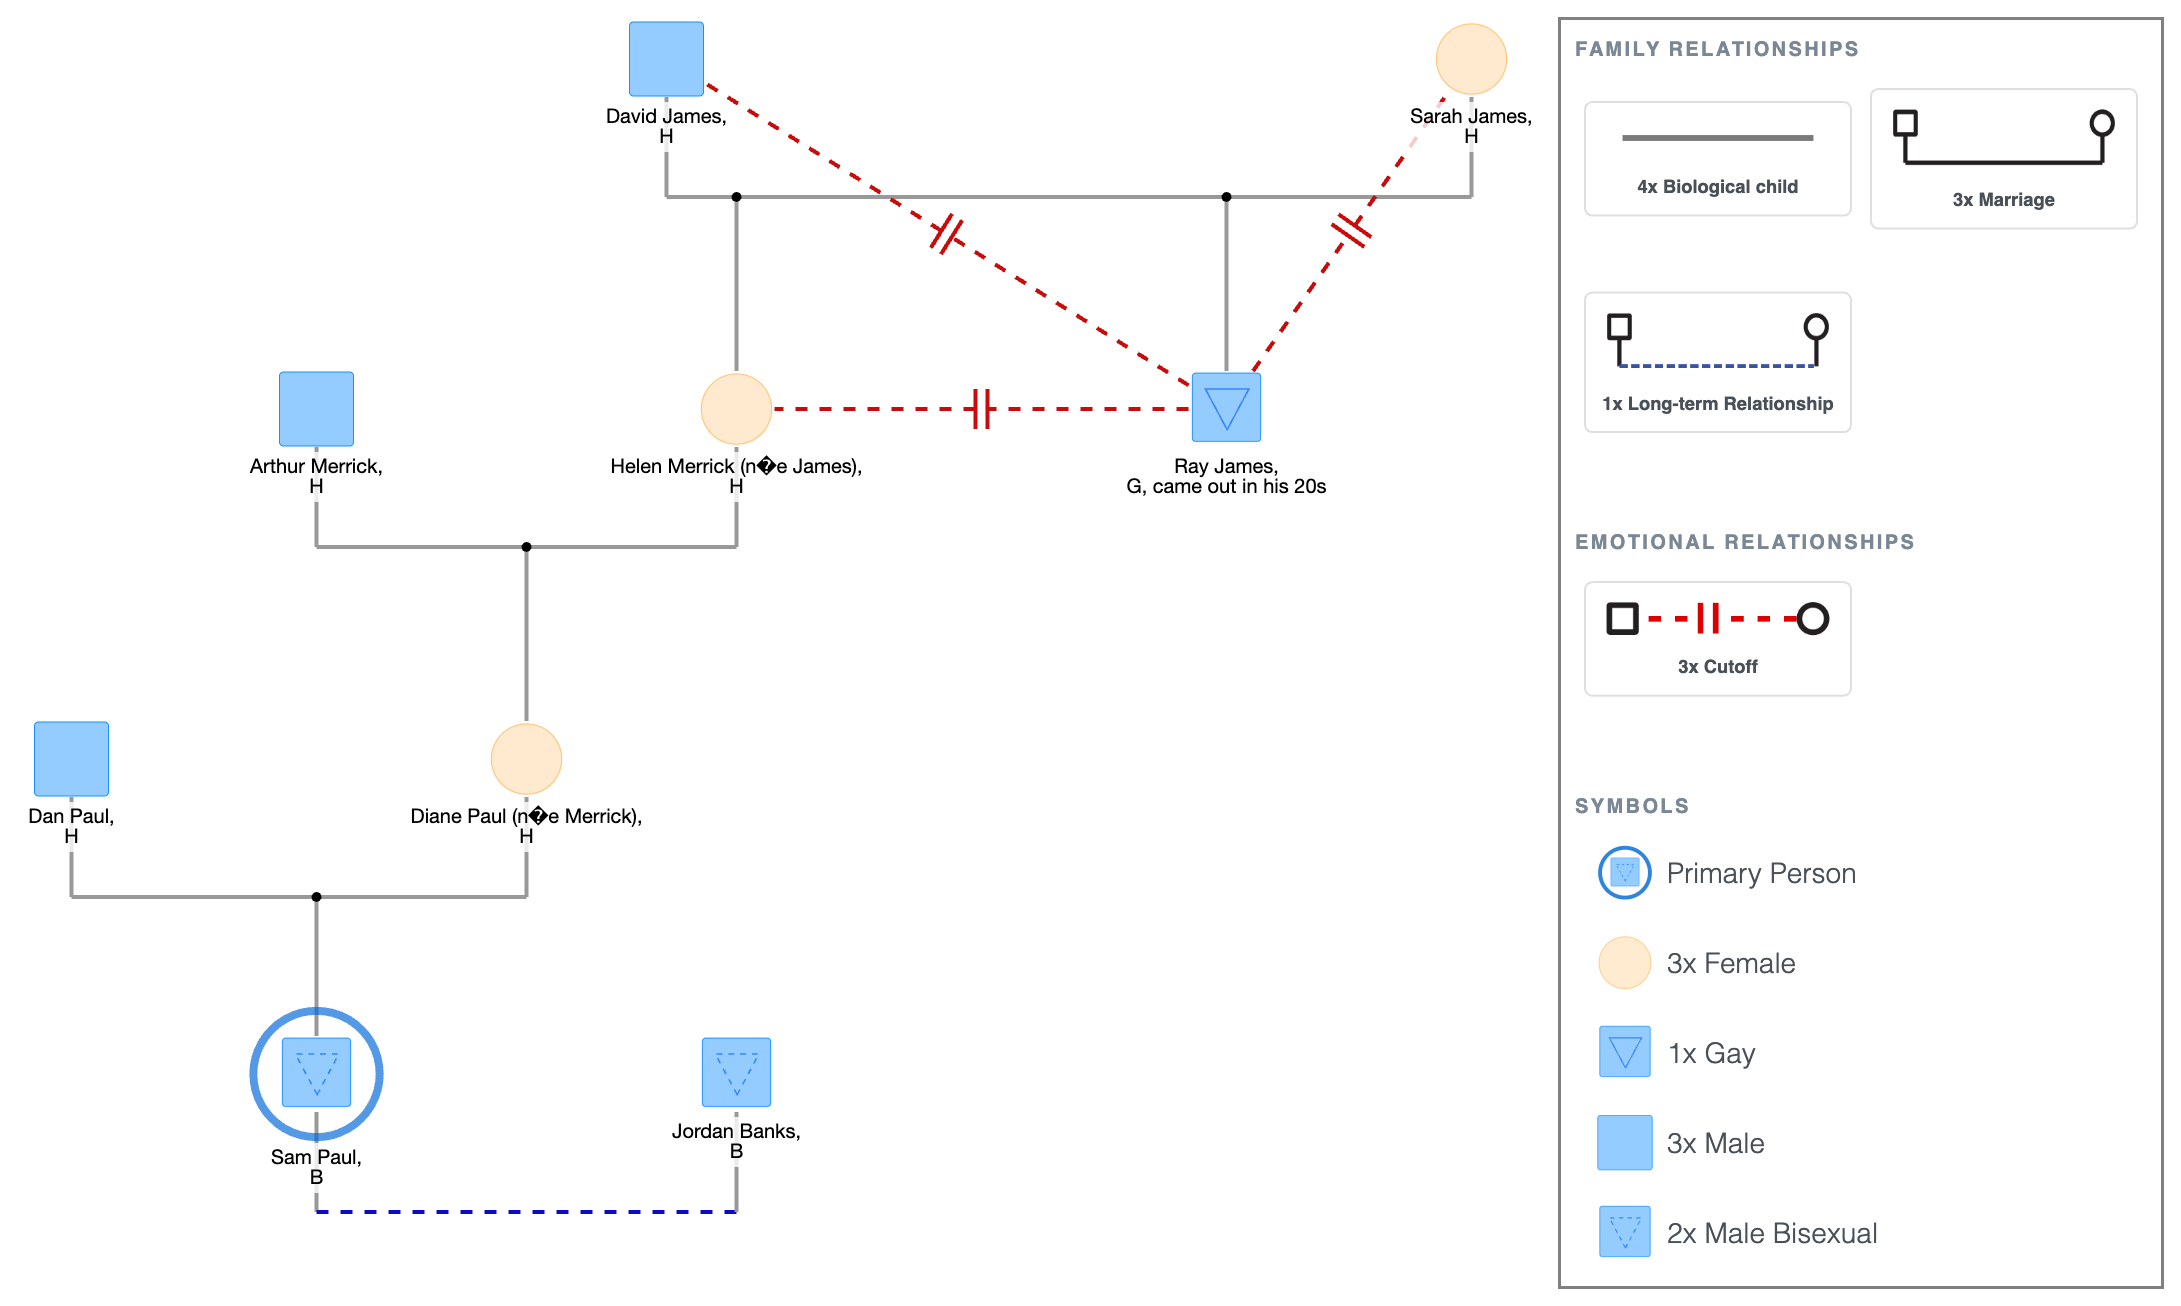
- Place Diane below Helen and Arthur's line. Add her partner, Dan Paul, with a solid marriage line. Tap both shapes and add H in the gender identity field.
- Place Sam below Diane and Dan's line. Add Sam's partner, Jordan Banks, with a long-term relationship line based on how Sam describes the relationship.
- Tap Sam's and Jordan’s shapes and add B in the gender identity field. Mark Sam as the primary person.
- Change Ray, Sam and Jordan’s shapes to the appropriate shapes; Gay, Male Bisexual and Male Bisexual respectively.
Gen 3 and 4: Diane, Dan, Sam, and Jordan
Step 7: Add the Sexual Communication Climate
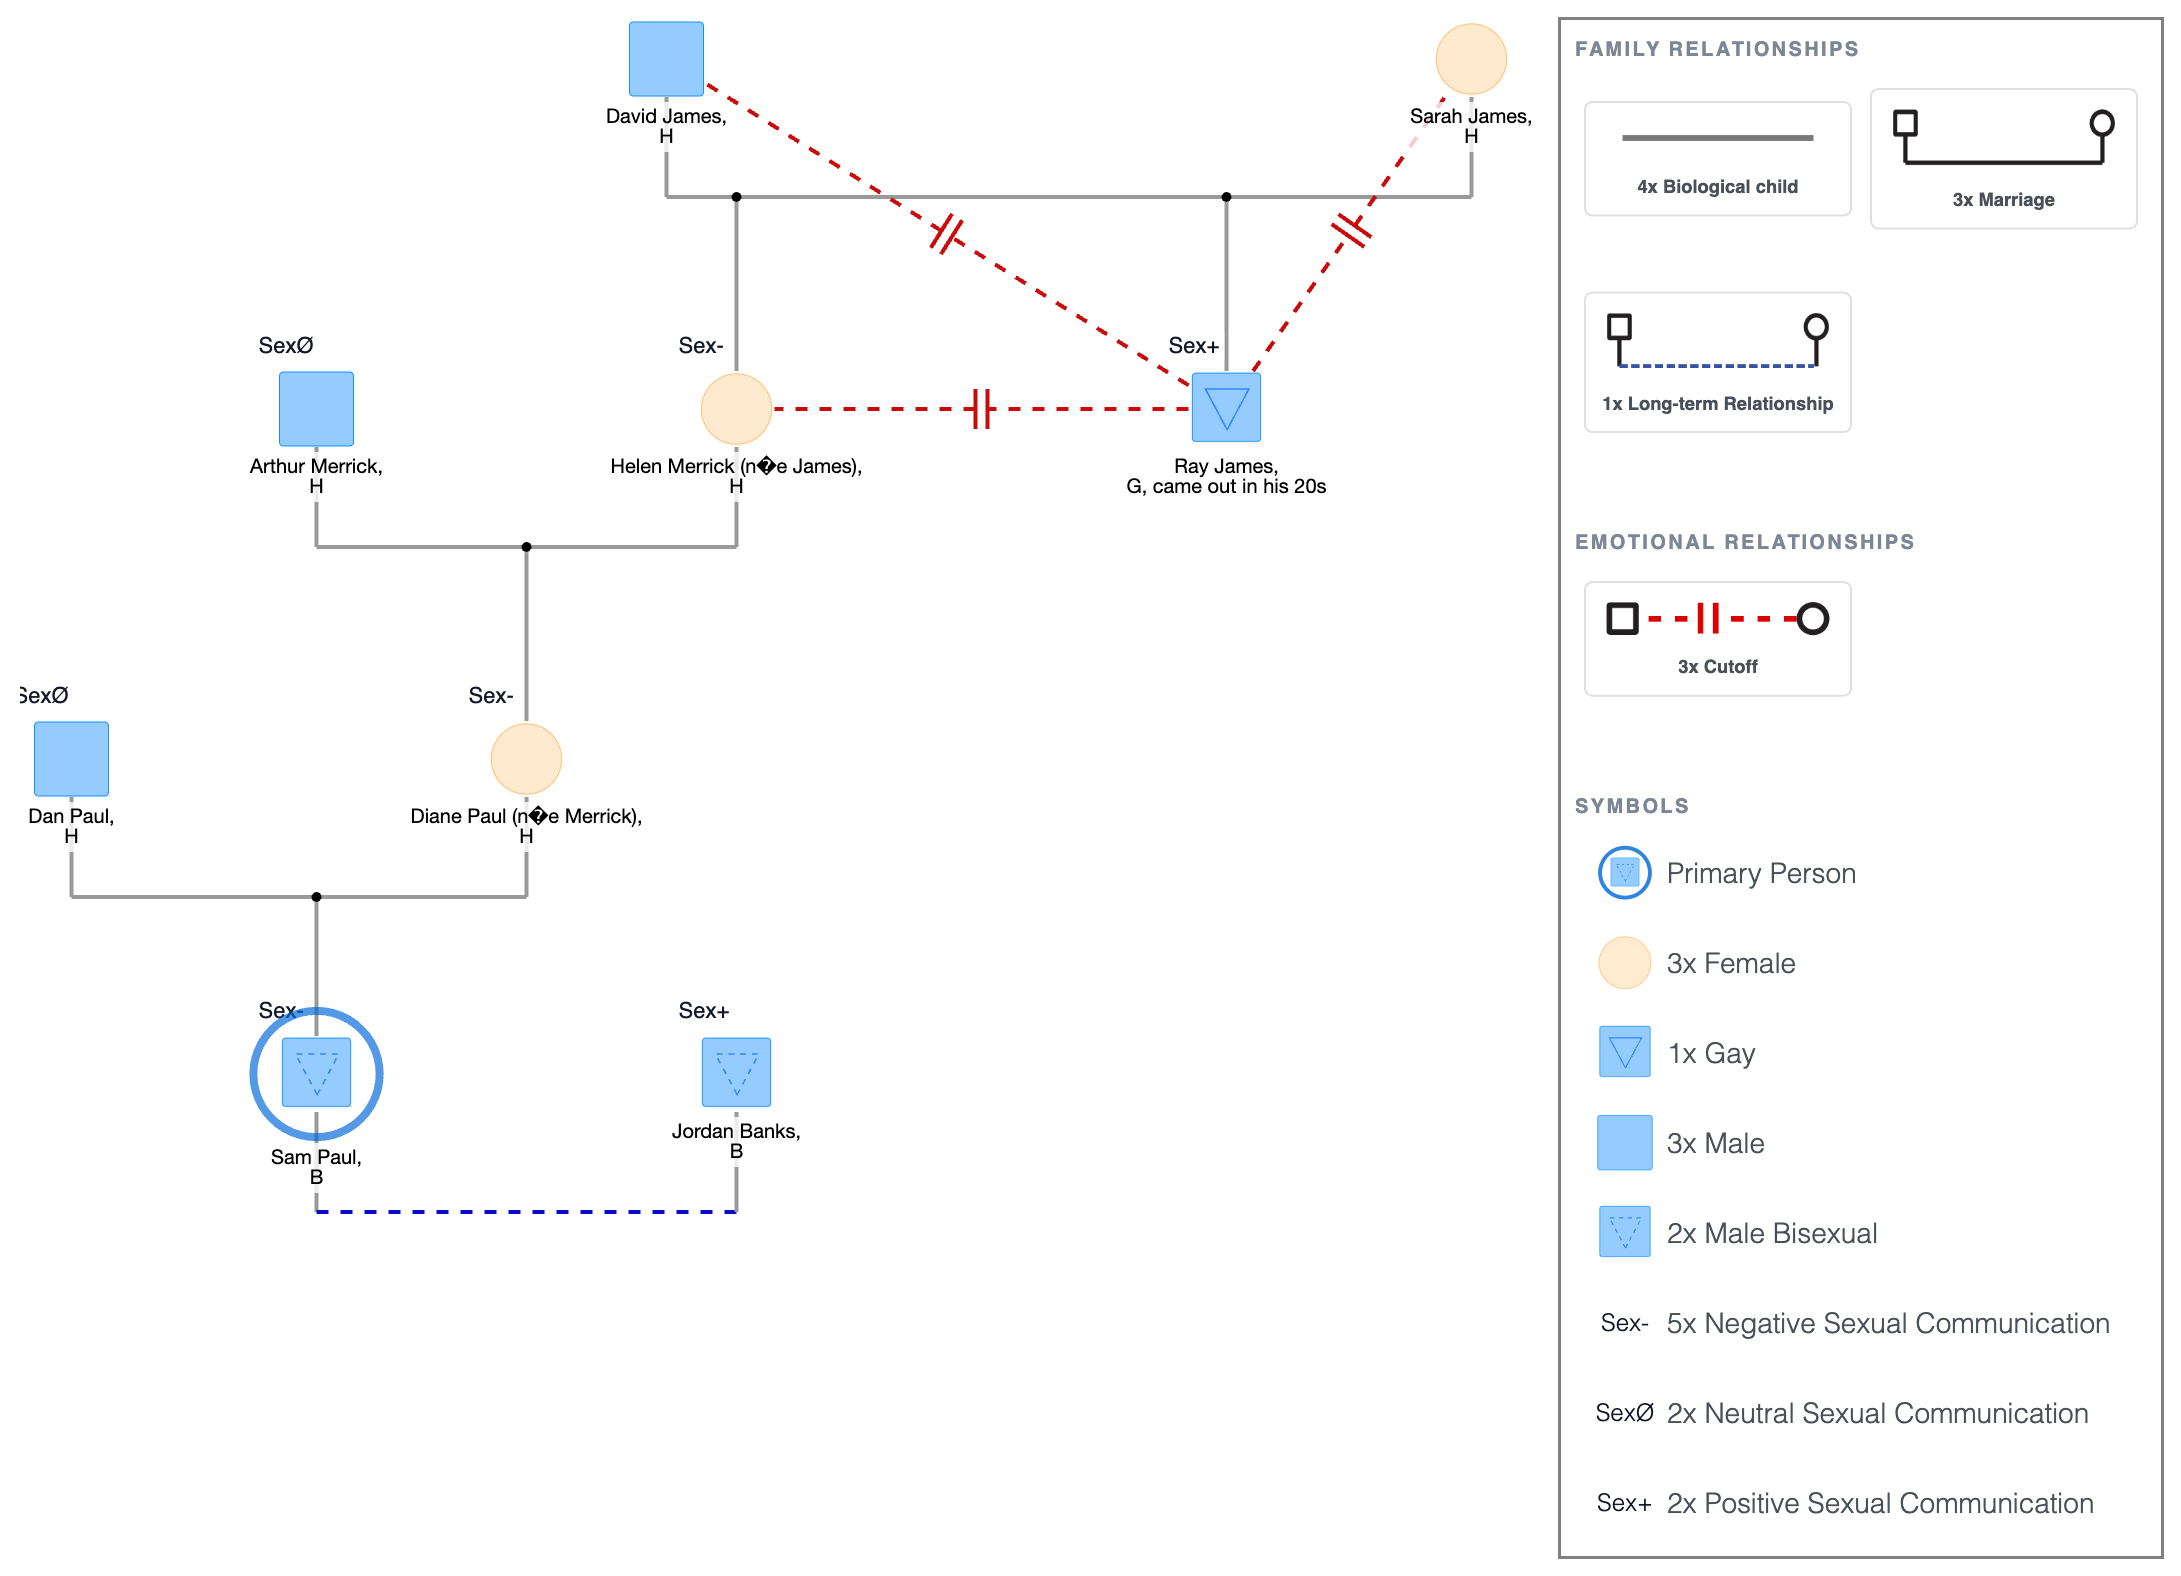
- Tap each shape, or circle the household as a group, and add the Sex+, Sex−, or Sex∅ label based on what the client describes.
- For the Merrick/Paul family, most of the household is marked Sex−. Ray and Jordan are marked Sex+. Dan and Arthur are marked Sex∅.
Completed four-generation sexual genogram
Step 8: Review and Export
Before exporting, run through this checklist:
- Every person has a self-identified orientation and gender code, not an assumed one.
- Relationship lines reflect real commitment, not just legal status.
- The family's sexual communication climate is marked.
- Any sexual secrets or cutoffs are shown.
- A legend is visible.
To export: tap PDF or PNG in the top bar.
FAQ
Do you need the client's full family history before starting?
No. Start with what the client knows and build from there. Gaps get marked as gaps rather than filled in with guesses, and more detail can be added in later sessions.
What order should the steps happen in?
Build the base structure first, generation by generation, then add orientation and gender codes, then the sexual communication climate. Review and export come last.
Can a sexual genogram be built without a client physically present?
Some of the skeletal structure can be prepared in advance from intake notes, but the sexuality-specific layers, orientation, communication climate, secrets, should come from the client directly rather than be assumed ahead of time.
How is this different from filling out a standard genogram?
The base structure and steps are the same. A sexual genogram adds a layer most standard genograms skip: a self-identified gender and orientation for every person, plus the family's sexual communication climate and any related secrets.
Should the sexual history timeline be done in the same session?
Not necessarily. Many therapists send it home as a separate exercise and bring it into a later session, since it asks for more detail than most clients can generate on the spot.
Sources
- The Sexual Genogram
- Revisiting the Sexual Genogram